A place to begin.
First, set up Arrive. Add your places and choose a unique check-in tag for each one. Save your private dashboard link, then leave the Setup page open while you build the Shortcut so its copy buttons stay within reach.
- An Apple device with the Shortcuts app
- Your check-in URL from Setup
- Your shortcut token and the tag for this place
Tell Arrive “I’m here.”
Your Shortcut sends the check-in. The easiest setup is one Shortcut per place, with that place’s tag saved inside it. You can make a reusable, variable-based version later if you want to.
Create your shortcut.
Open the Shortcuts tab—not Automation—tap +, and name it for the place, such as “Arrive — Office”. Add the Get Contents of URL action and enter the POST URL shown in Setup. Use Copy URL so you do not have to type it.
Add your check-in details.
Set the method to POST and the request body to JSON. Tap Add new field, choose Text, and add two rows named
tokenandtag. Back in Setup, use Copy token and the place’s Copy tag button to fill their values. Add the rows separately—do not paste a whole JSON object. The tag must match exactly, including case, spaces, and punctuation.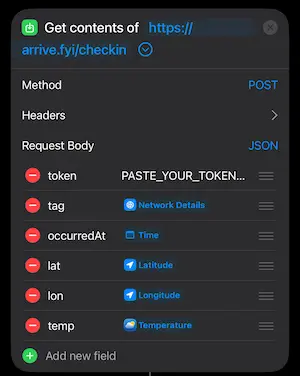
Use the values from your own Arrive setup. Give it a quick test.
Run the shortcut once. Open your private dashboard link and check that your new arrival appears.
Keep these details private. Your dashboard link gives access to your history. Your shortcut token allows check-ins. Store both somewhere safe.
Choose what means “I’m here.”
Once the Shortcut works when you run it yourself, connect it to the trigger that fits the place. The screenshots use Wi-Fi as one example; wording and available triggers may differ by device and system version.
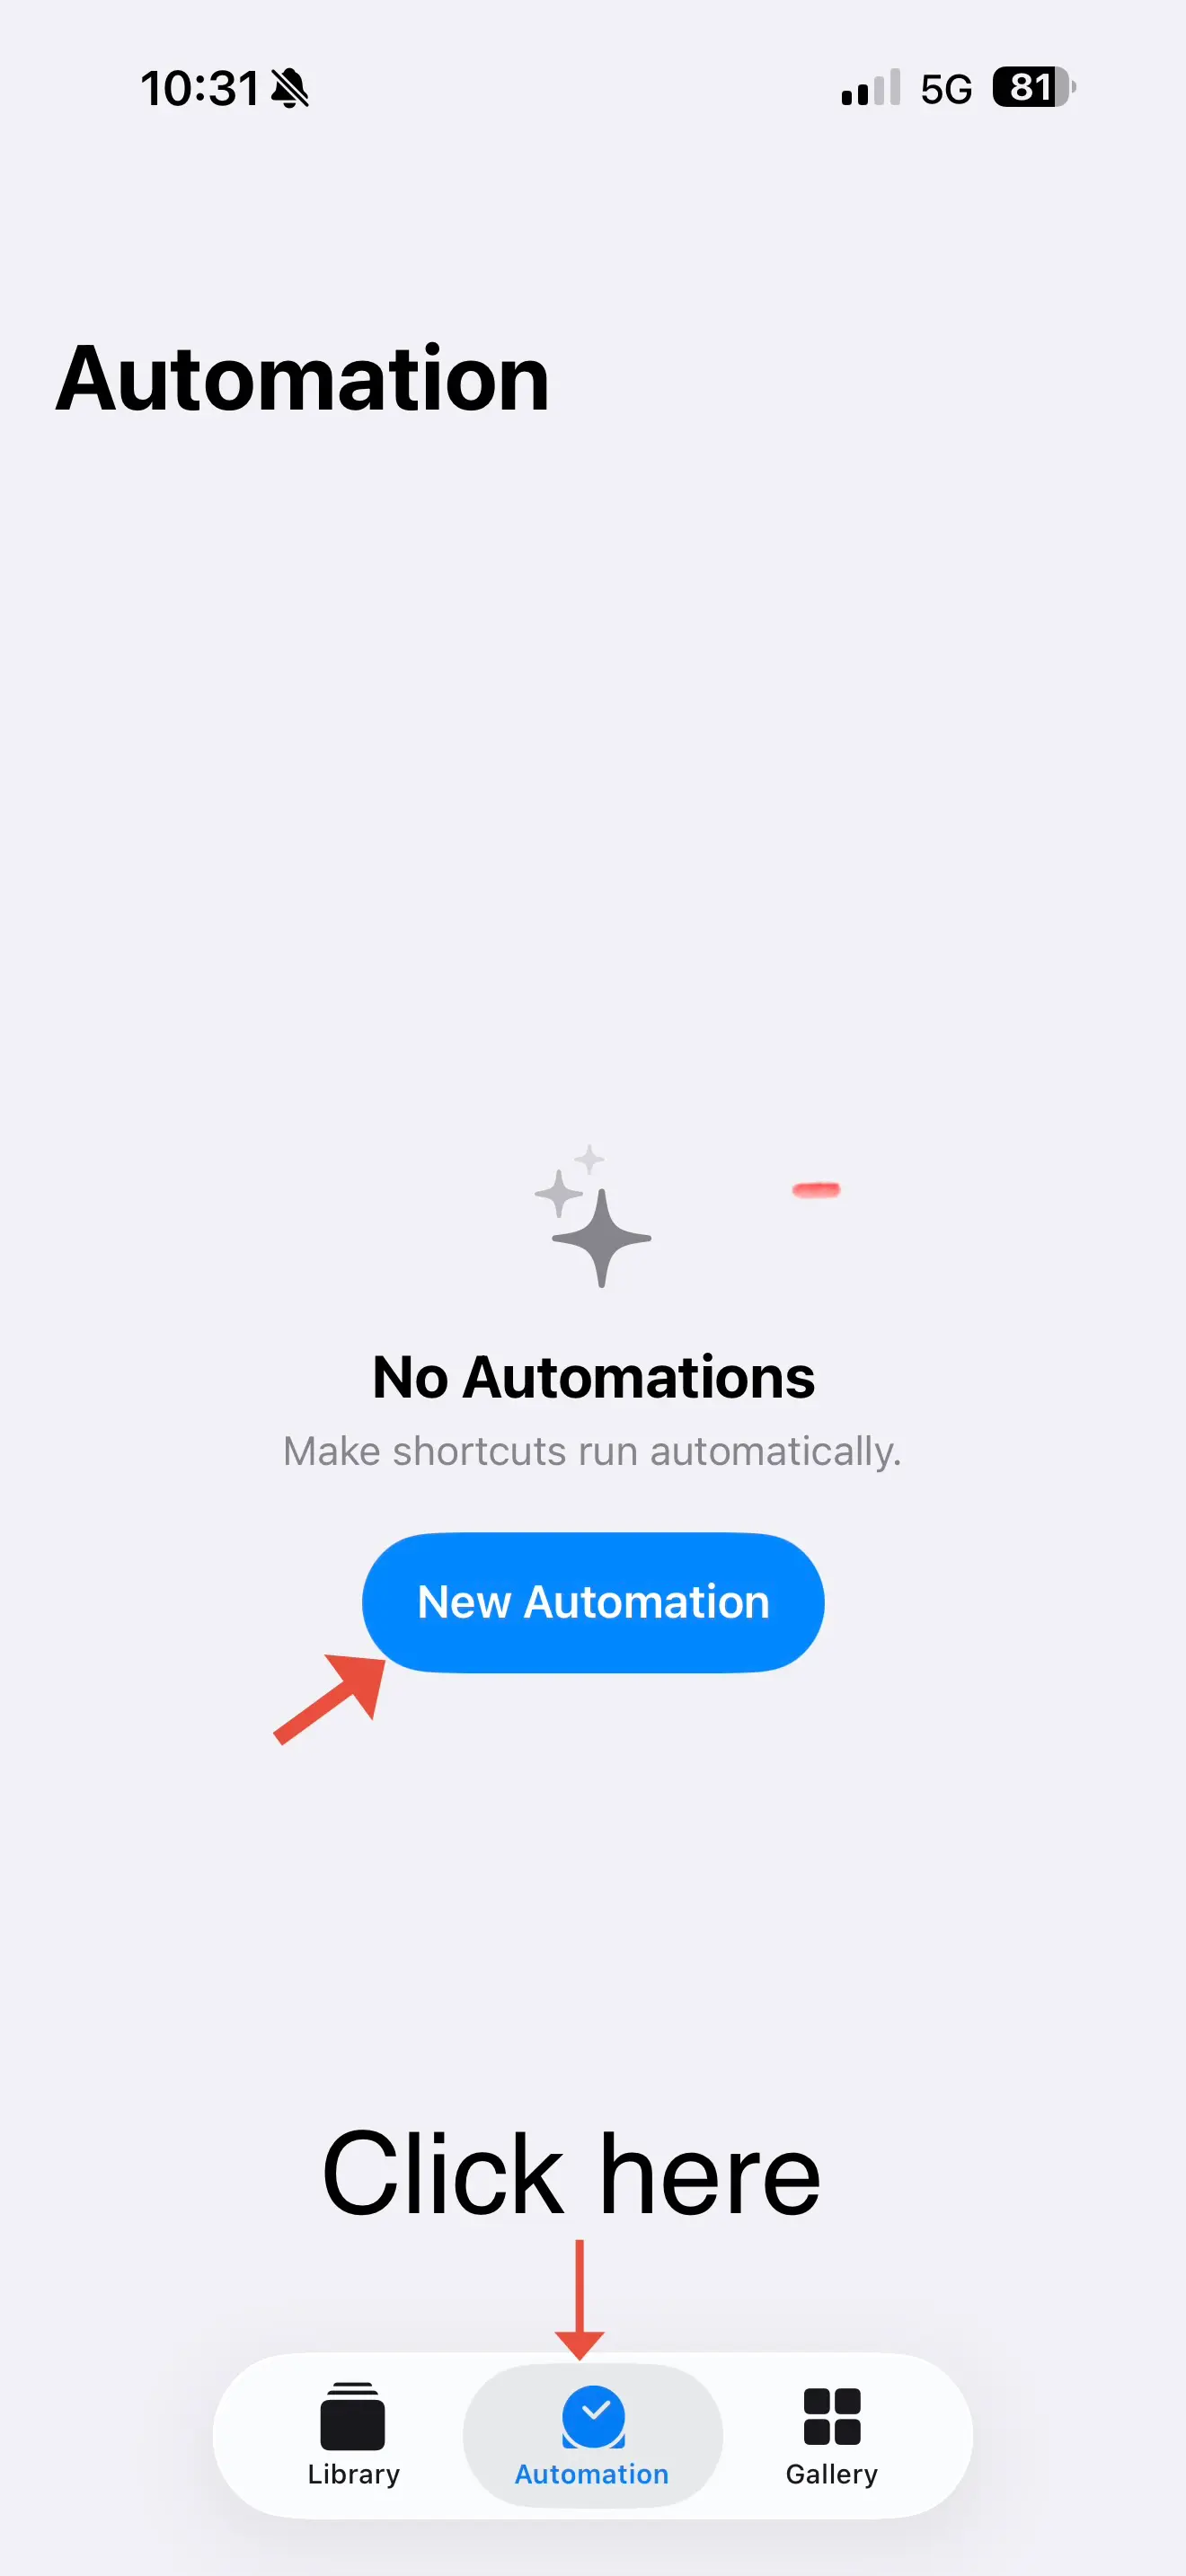
1. Start an automation.
Open the Automation tab in Shortcuts. Tap + or New Automation.
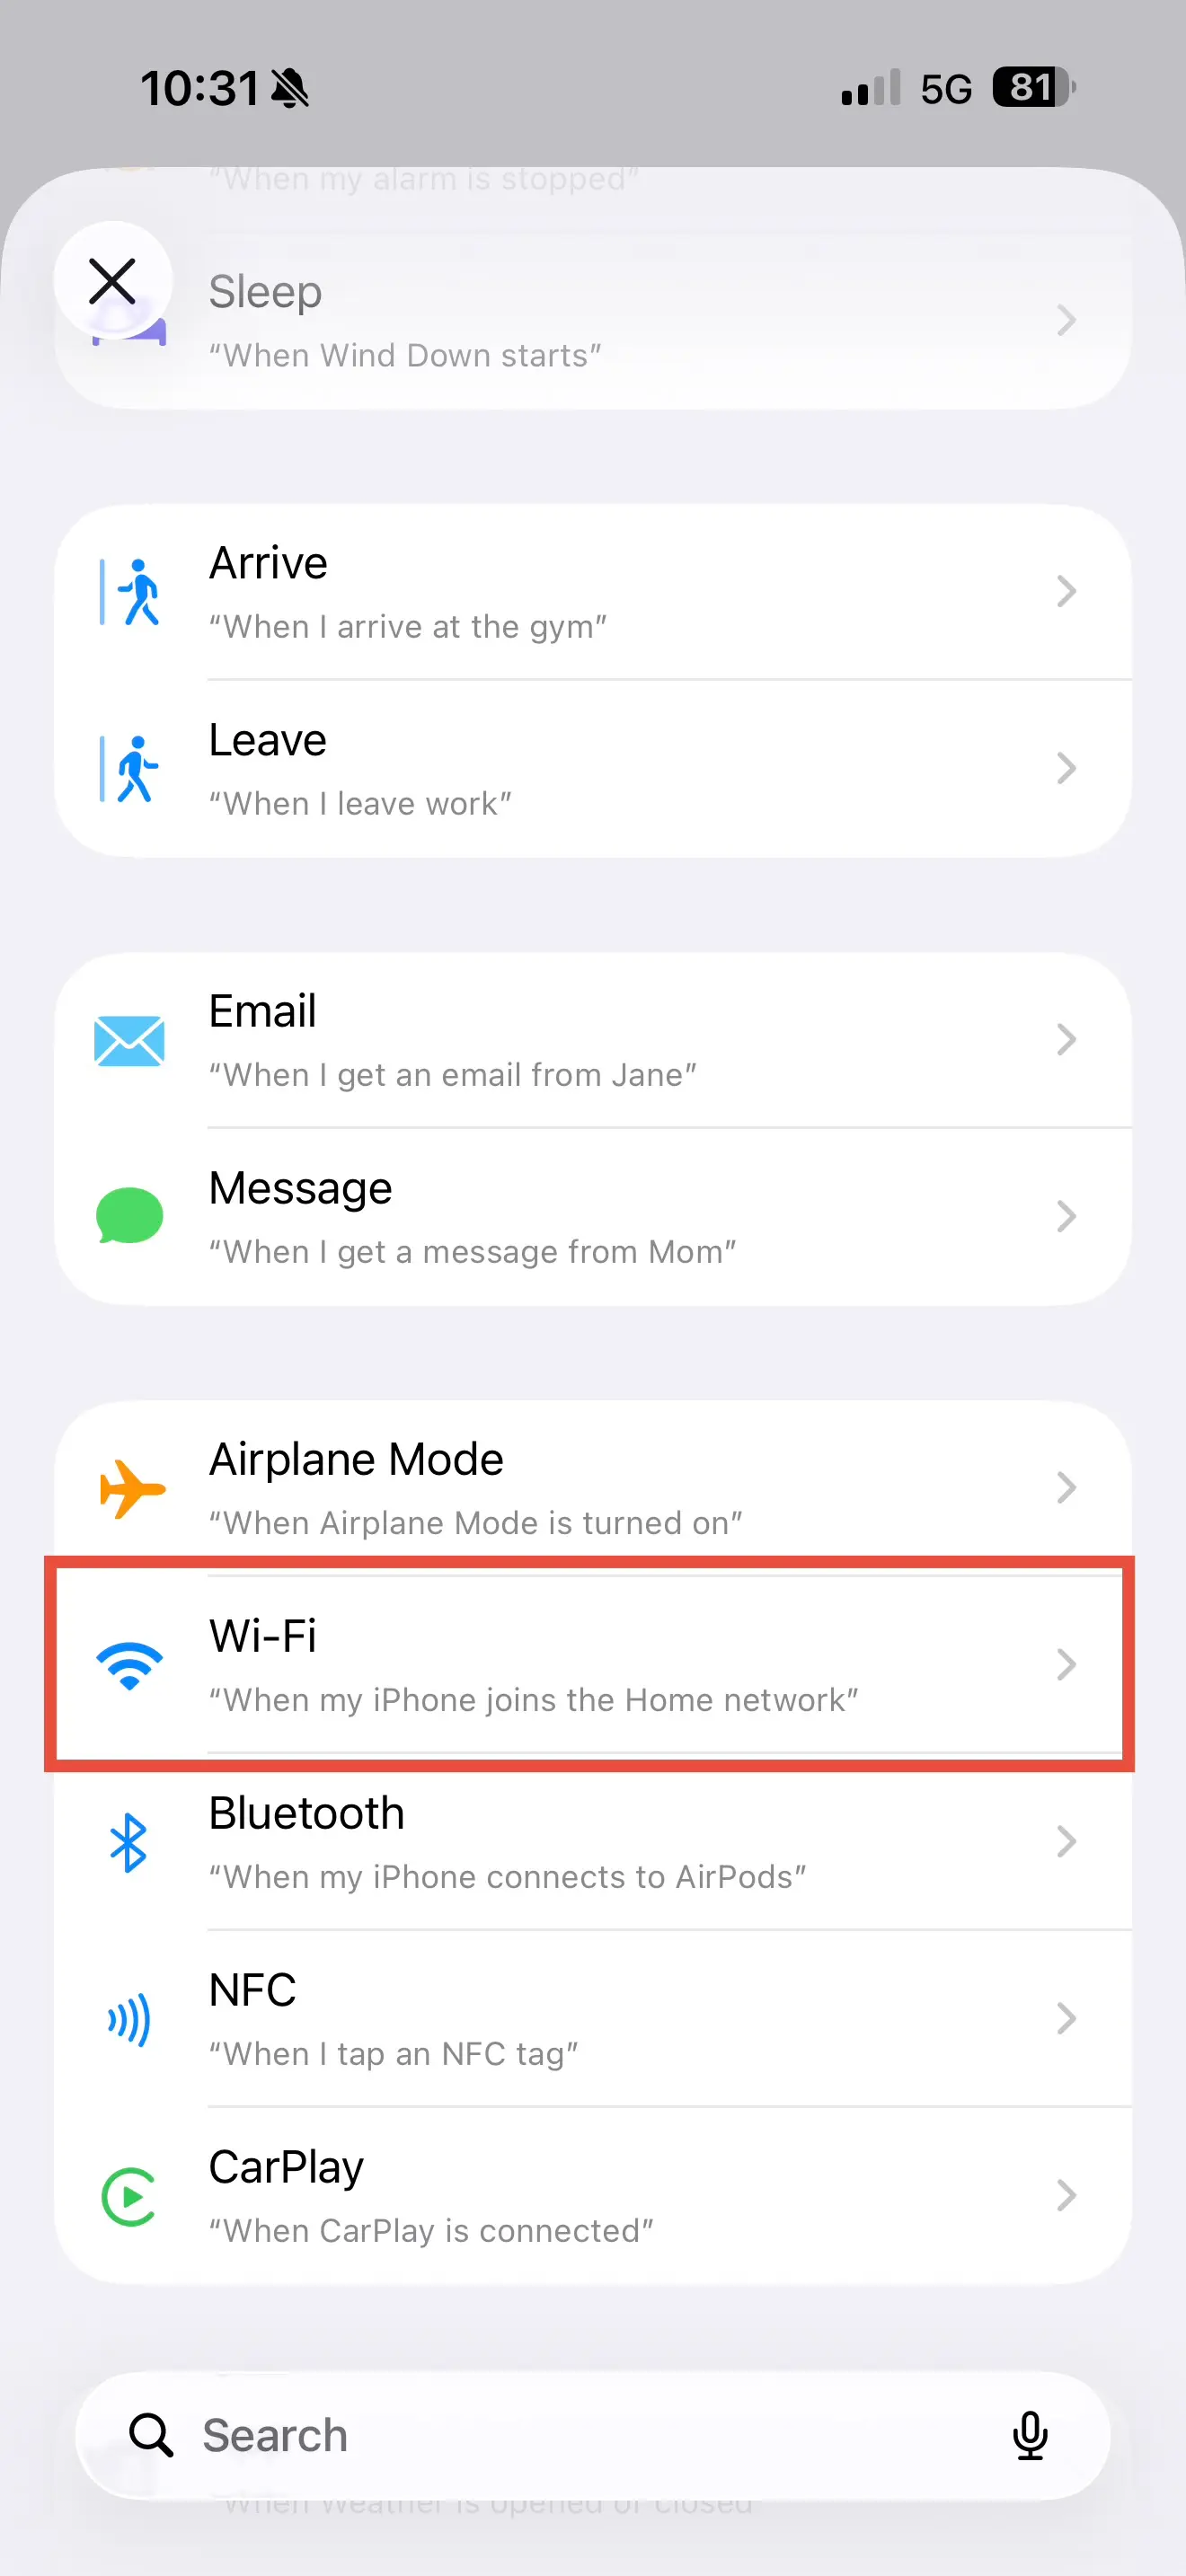
2. Choose your trigger.
Select what should count as arriving. Wi-Fi is shown here, but you can use Bluetooth, NFC, CarPlay, location, an app, or another available trigger.
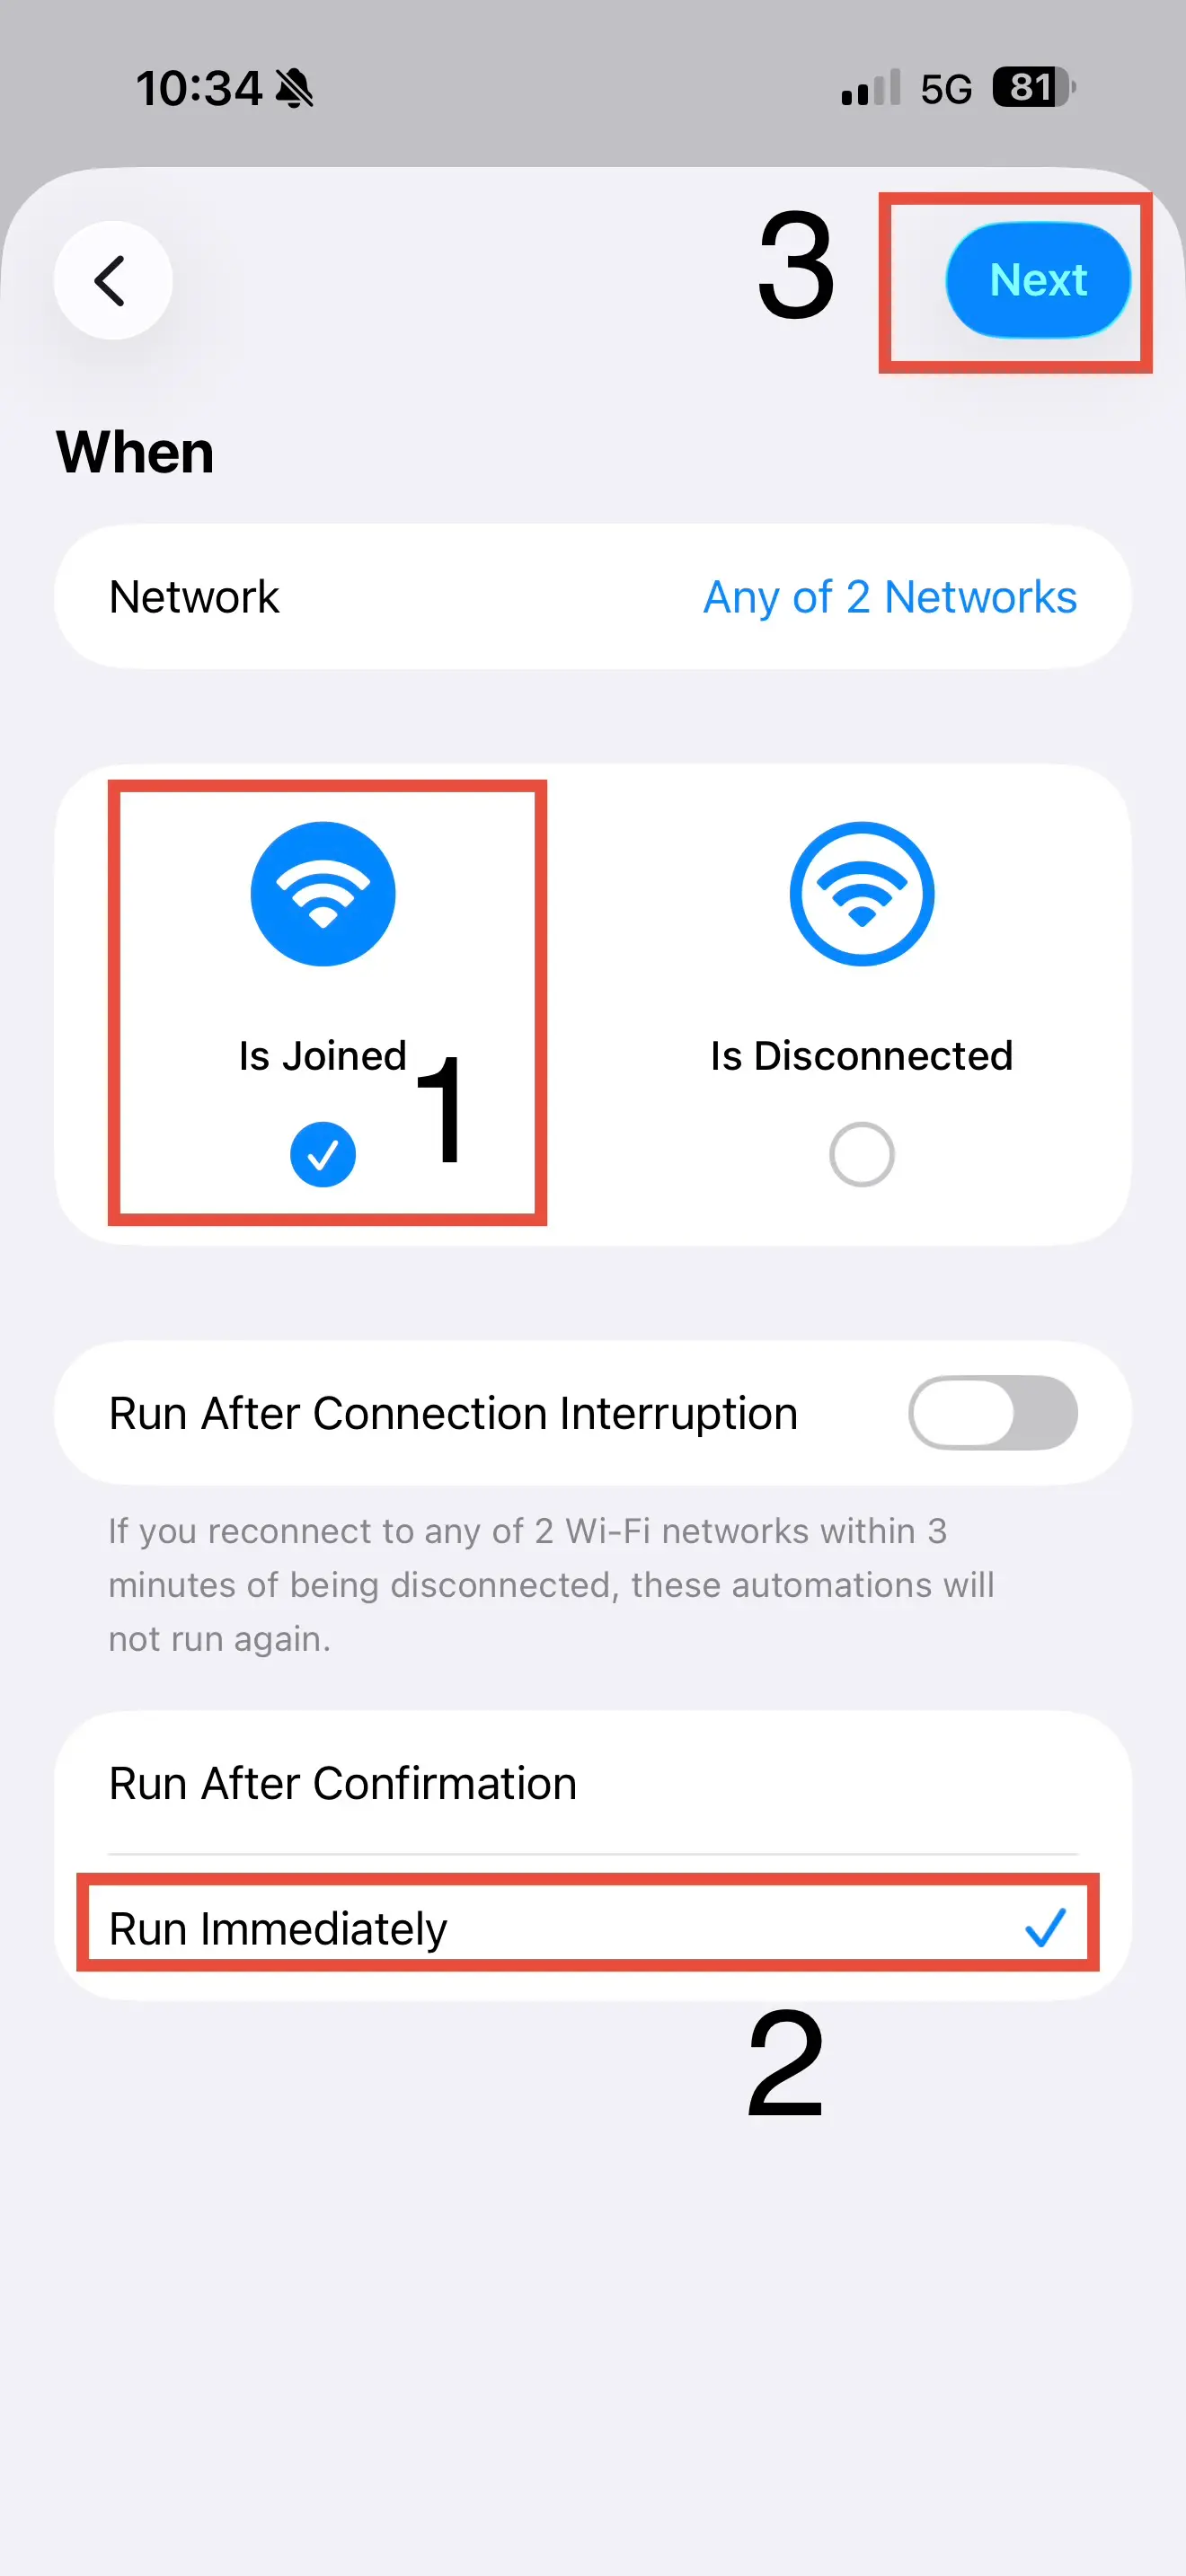
3. Configure the event.
Choose the device, network, tag, or event for this place. When available, select Run Immediately, then continue.
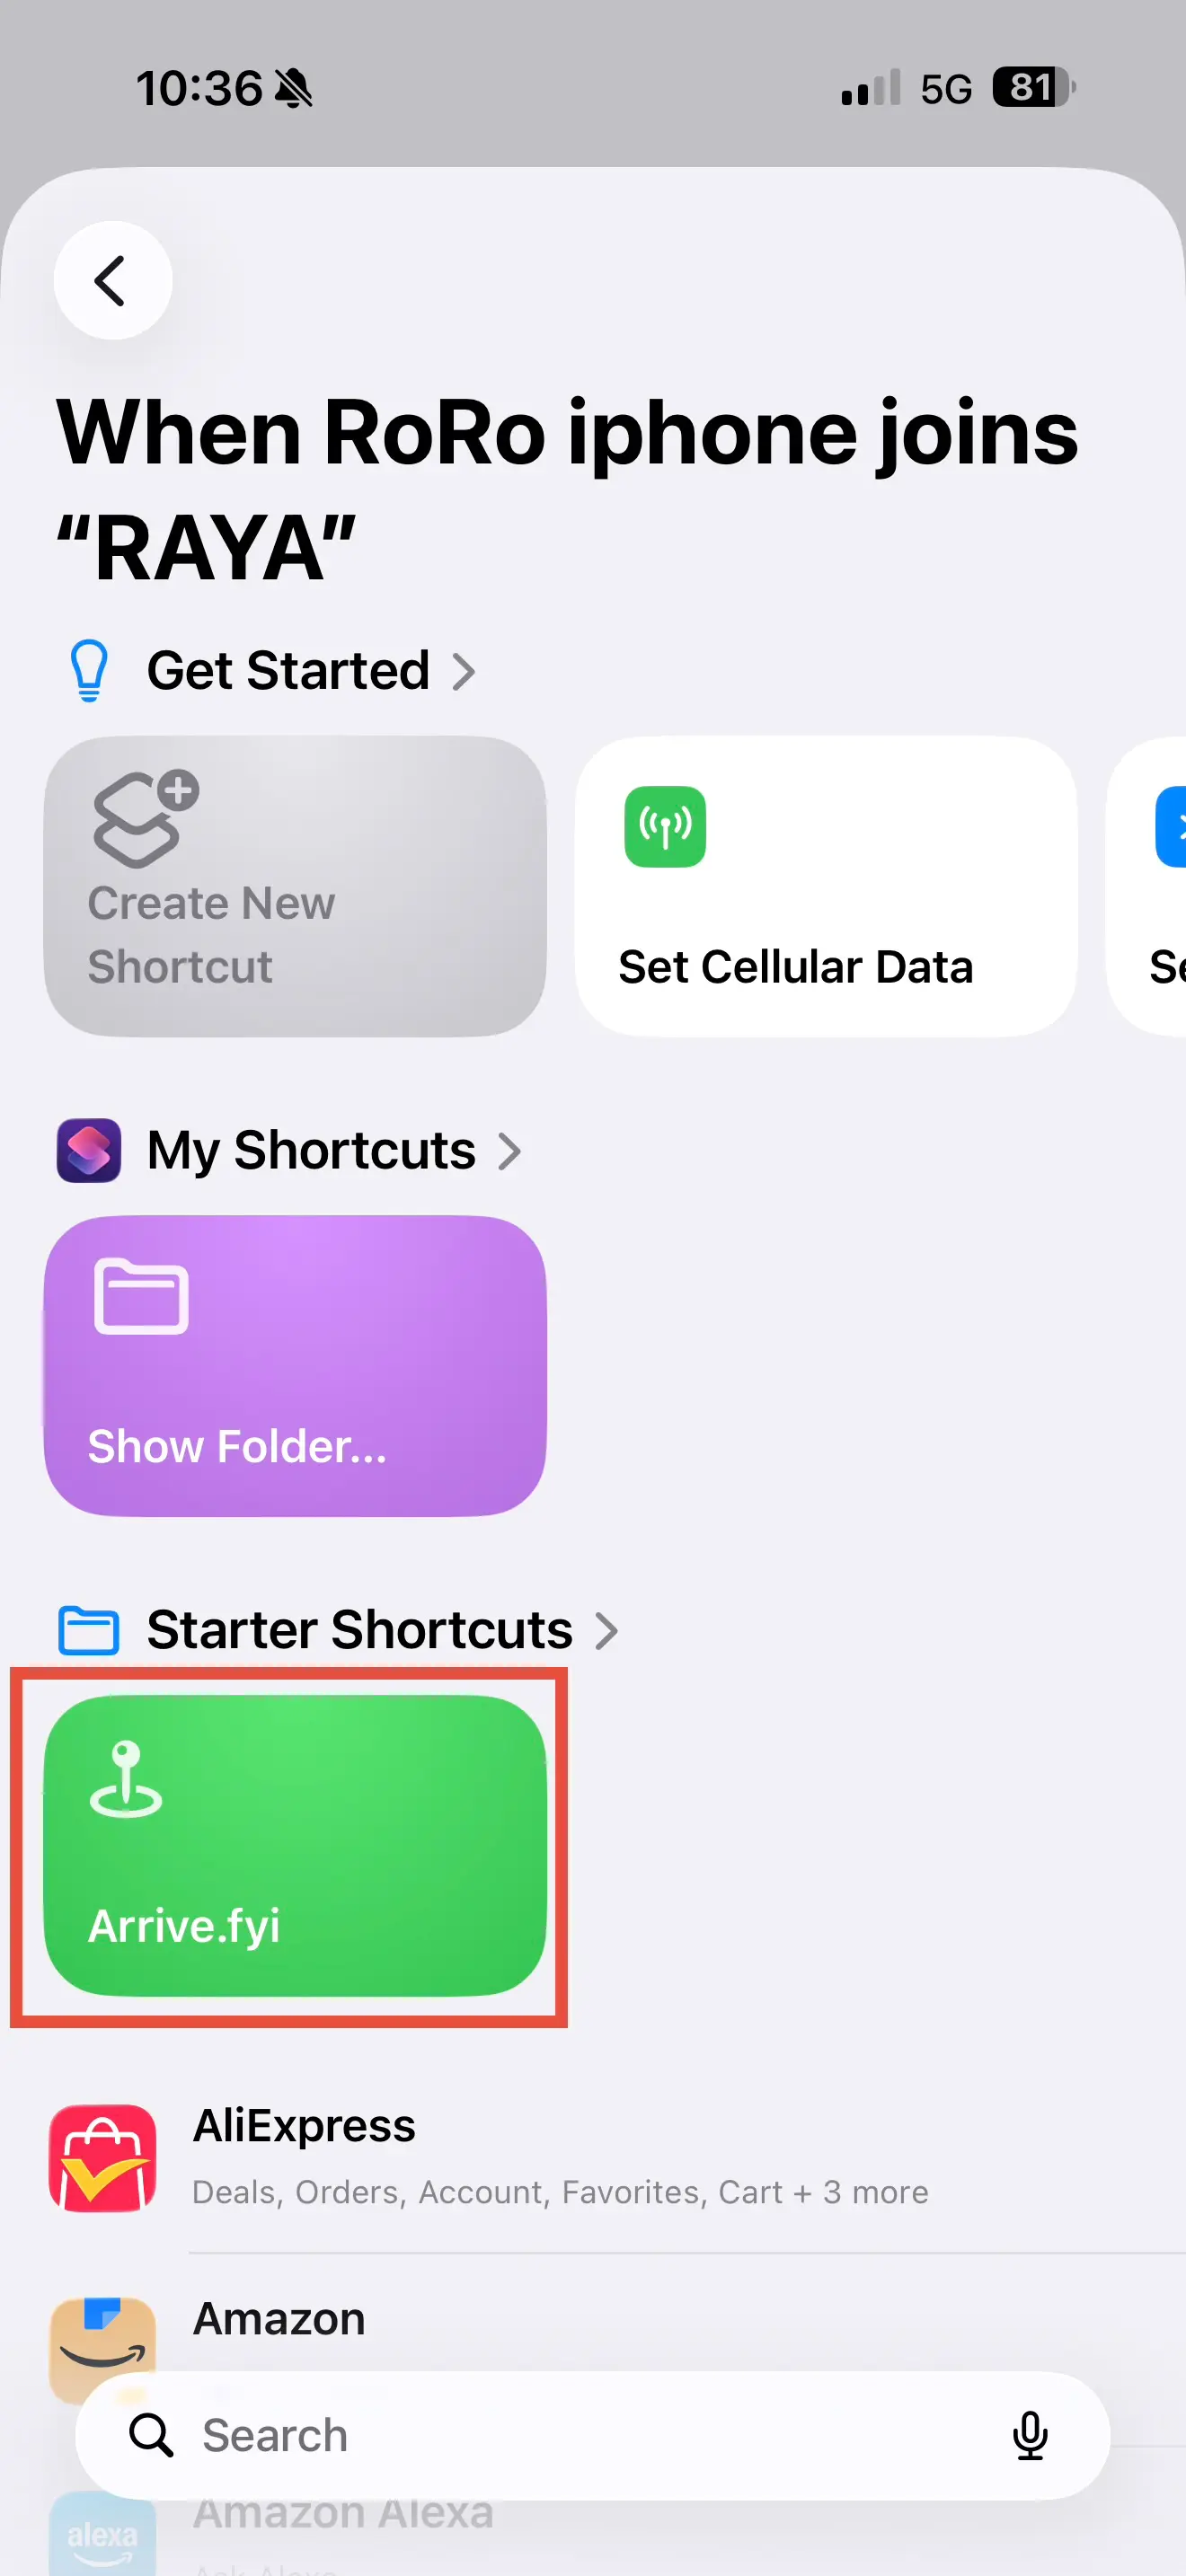
4. Choose your shortcut.
Choose the existing Arrive Shortcut you already tested. Repeat with the triggers and places you want to track.
You are not limited to Wi-Fi. Bluetooth, NFC, CarPlay, arriving at a location, opening an app, and other Shortcuts automations can all run the same check-in. On a Mac, you can also assign a keyboard shortcut. Whatever starts it, make sure the JSON tag matches the place in Arrive.
For the current trigger options, see Apple’s automation guide ↗.
Not seeing a check-in?
Check the place tag.
Your shortcut’s tag must match the tag saved in Arrive, including uppercase letters, spaces, and punctuation.
Check your automation and connection.
Make sure the automation uses the intended trigger and runs your Arrive shortcut. Run the shortcut manually first to check the URL, token, and tag. Your device needs an internet connection to send a check-in.
Adding optional coordinates?
Add both lat and lon. Arrive accepts Shortcuts Number values or plain decimal Text values such as 37.3317; leave out degree symbols, commas, and other formatting. You can also omit both fields entirely.
Just checked in? Give it a moment.
Arrive rejects repeated arrivals at the same place within ten minutes. If you’re testing twice in a row, wait before sending another check-in.